A dog birthday hat is a fun and easy way to add excitement to your dog’s birthday celebration. All you need is some basic supplies and a little bit of creativity. Here are the steps to making your dog’s birthday hat:
1. Choose a base for your hat. Cut out a circular shape that will fit comfortably around your dog’s head. You can use felt, construction paper, or even an old t-shirt.
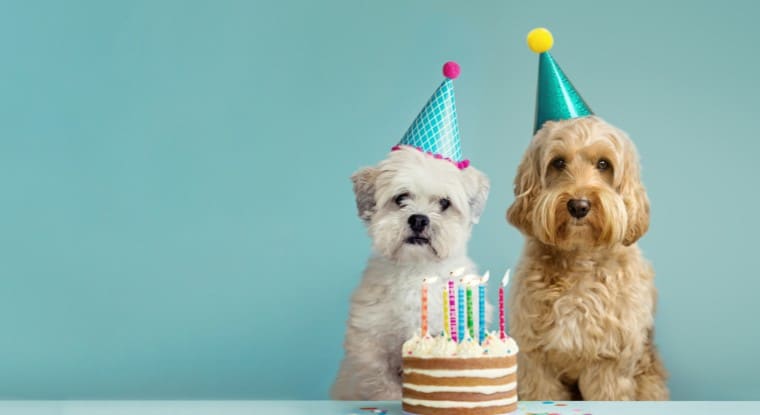
2. Decorate your hat however you’d like! Add ribbons, pom-poms, or anything else that you think would look cute on a birthday hat. Use pet-safe materials if your dog likes to chew on things.
3. Attach the decorations to the hat using glue or tape. Using an old t-shirt, you can tie the decorations onto the fabric.
4. Put the finishing touches on your hat by adding a “Happy Birthday” banner or another fun message.
You can also write your dog’s name on the hat, so everyone knows who the special birthday boy or girl is!
How Can I Make a Homemade Birthday Hat for My Dog?
Making a birthday hat for your dog is a fun and easy way to show them how much you love them. All you need is some construction paper, scissors, glue, and string. Here are the steps:
1. Cut out two semi-circles of construction paper. These will be the sides of the hat.
2. Cut out a smaller semi-circle for the top of the hat.
3. Glue all three pieces together, leaving a hole at the top for your dog’s ears to stick through.
4. Tie a string around the base of the hat so it will stay on your dog’s head.
How Do I Make a Dog Hat?
Assuming you would like a step-by-step guide on how to make a dog hat: You will need the following supplies:
– 1/4 yard of polar fleece or other soft fabric – Scissors – Needle and thread or sewing machine – Tape measure or ruler – Chalk or pen!
Instructions:
1. Cut two rectangular pieces of fabric, one for the front and one for the back of the hat. The dimensions of the rectangles will depend on the size of your dog’s head. To get these measurements, wrap a tape measure around your dog’s head just above their ears and write down this measurement. Then, add 1 inch to that measurement and use that number as the width of your rectangles. As for length, Measure from the top of your dog’s head (where you took the circumference measurement) down to just between their eyes, then add 3 inches to that number. This final number will be used as the length for both rectangles.
2. With right sides together, sew front and back pieces along both long sides with a ½ -inch seam allowance, leaving a 2–3 inch opening along one side so you can turn it right side out later. Be sure not to sew across the short ends yet! Finish raw edges with either a serger (if you have one) or by zigzagging over them with your sewing machine set on a wide zigzag stitch setting so they won’t fray too much when turned right side out later on. You could also use pinking shears if you have them instead, which would serve the same purpose without having to change stitches on your machine.
3. Once all four sides are sewn with finished edges, it’s time to turn it right side out through that opening you left along one long side earlier using either a turning tool like a chopstick or simply by pushing it through with your fingers carefully not to tear any seams in the process. Once it’s turned completely right, side out now is when you’ll close up that hole using either ladder stitch by hand or closing it up with your sewing machine using a very small straight stitch, making sure to backstitch at the beginning and end well so it doesn’t come undone later on easily since this area will be taking some stress from wearing later on…
4. (a). If you’re planning on adding embellishments such as felt appliqués, buttons, etc., do so now before continuing to the next step, which is putting in elastic. Lay appliqué piece(s) where desired and sew into place using matching thread color OR contrasting thread, depending on what look you’re going for exactly…
4. (b). If not embellishing, skip the next step, putting in elastic.
5. (a). To put in elastic, first cut two lengths measuring from ear level down around the back of the neck and meeting up at another ear level again. Now fold each length in half so you have two loops and a safety pin, each loop closed temporarily. These numbers will vary depending upon the dog, but the rule of thumb is generally 12″ – 14″ should suffice for most dogs under 80lbs, give or take…
5. (b). Sew each loop at the top inside edge about an inch below the top raw edge, making sure not to catch any fabric underneath while doing so…
6. Last step is simply trimming off any excess threads & voila! All done!
How Do You Make a Small Party Hat for Animals?
Assuming you would like a tutorial on making a small party hat for animals: You will need:
-A4 sheet of paper -Scissors -Glue -Stapler -Ruler or measuring tape -Pencil.
Instructions:
1. Start by folding your A4 sheet of paper in half lengthwise. Then, cut along the fold. You should now have two long strips of paper.
2. Next, take one strip and fold it in half widthwise. Cut along the fold, and you should now have two smaller strips. Set one aside for later.
3. Take the other small strip, measure 2cm from one end, and mark with a pencil. Then, cut along the 2cm line. You should now have a tiny triangle shape piece of paper left over (this will be used as the pointy part of the hat). Set this triangle aside for later as well.
4. Now, take the remaining large strip of paper, measure out 5cm from one end, and mark with a pencil. Then, cut along the 5cm line (wait to throw away the leftover piece of paper!). You should now have a slightly smaller strip of paper than before – this will be used as the base/circumference of the hat brim.
5.(Optional) To make sure your hat is extra sturdy, go ahead and put some glue on one end of both strips of paper (the large brim strip AND the small top part strip) and wait for it to dry completely before moving on to step 6! This step is especially important if you plan on using this hat more than once 🙂 Now that everything is dried and ready to go, let’s start assembling!
6 . Take the large brim strip (with glue already drying or not) and place it around your animal’s head like so…and then staple it together at both ends to keep it secure! Make sure to leave about a 1 cm gap between where you staples each end – we’ll need this space later when attaching our top part!
7 . Now take your small top part strip (again, with glue already drying or not)… place it horizontally across that 1 cm gap we left earlier on our brim…and staple it in place!
8 . Finally, all left is to attach our little pointy triangle onto our hat’s top center front portion…and voila!
How Do You Measure a Dog’s Head for a Hat?
When finding the perfect hat for your dog, one of the most important things to consider is the size of their head. After all, you want the hat to fit snugly and look cute simultaneously! But how exactly do you measure a dog’s head for a hat?
There are a few different ways that you can go about doing this. One method is to wrap a tape measure around your dog’s head, just behind its ears. Ensure the tape measure is level and tight against their fur – but not too tight! – and then take note of the measurement. Another option is to trace around your dog’s head on a piece of paper and then use a ruler or measuring tape to determine the circumference. Once you have your measurement, compare it to our sizing chart (link) to find the perfect-sized hat for your pup!
DIY Dog Party Hat | Cat Party Hat | Rainbowww DIY
How to Make a Party Hat for a Dog Out of Paper
Whether you’re throwing a birthday party for your dog or want to dress them up for a fun day out, making a party hat for them is easy! All you need is some paper and a few other supplies. Start by cutting a strip of paper about 3 inches wide and 18 inches long. Then, fold the strip in half lengthwise. Next, take one end of the strip and make a cone shape with it, securing it with tape.
Now comes the fun part – decorating! You can use whatever you like to make your dog’s party hat unique. Paint it, wrap it in ribbon, and add some pom-poms – get creative! Just make sure whatever you use is safe for your dog if they happen to chew on it. Once you’re happy with your design, put the hat on your pup and let the party begin!
In Summary
This blog post provides step-by-step instructions for making a birthday hat for your dog. The author provides templates that you can use to cut out the hat shape. You will need basic supplies, including felt, ribbon, and a hot glue gun. Once you have assembled the hat, you can decorate it with ribbons, sequins, or other embellishments. Your dog will be sure to enjoy their special birthday hat!