Gift wrapping baskets may seem daunting, but with a few simple tips, it can be easily done! First, choose the right size basket for the item you want to wrap. If the basket is bigger, the items inside may shift and become damaged during transit. Conversely, if the basket is smaller, there will be a lot of wasted space and materials. Once you have selected an appropriately sized basket, line it with tissue paper or shredded paper to help keep items in place and protect them from being scratched. Next, begin adding your items to the basket and distribute them evenly throughout. Finally, once all your items are in the basket, fill any remaining space with more tissue paper or shredded paper before wrapping it up with cellophane or another type of clear wrap. With these steps followed, your gift-wrapped basket will look beautiful and professional! Here’s how you wrap the basket:
- Select the basket you would like to gift wrap
- Make sure it is the right size for the number of items you will be putting inside
- Choose your wrapping paper
- If you are using patterned paper, make sure it coordinates well with the basket and items inside
- Cut your paper to size, allowing enough excess to tuck under the basket rim
- Apply adhesive to the back of the paper and attach it to the basket, being careful to smooth out any wrinkles or bubbles as you go
- Once the entire basket is covered, trim away any excess paper and secure any loose edges with tape if necessary!
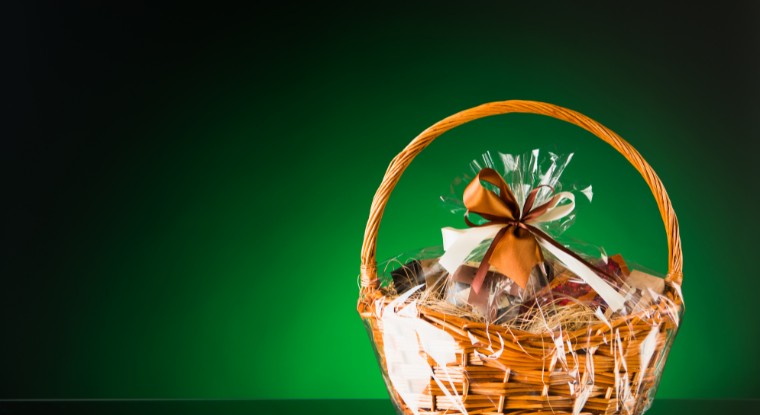
How to wrap a gift basket
How to Wrap a Gift Basket Without Cellophane
Gift baskets are a great way to show someone you care. But if you don’t have cellophane on hand, don’t worry! There are plenty of other materials you can use to wrap your basket.
First, find a pretty piece of fabric that will complement the contents of your basket. Cut the fabric to size, allowing for extra to fold over the top and bottom of the basket. Next, use a hot glue gun to attach the fabric around the basket. Be sure to pull the fabric tight so that it hugs the contours of the basket and there are no gaps. Once the glue has dried, decorate your wrapped basket with ribbons, bows, or anything else you like. Then fill it with goodies and enjoy!
How Do You Arrange And Wrap a Gift Basket?
If you’re looking to make a beautiful and unique gift basket, there are some things you’ll need to keep in mind. Here are a few tips on arranging and wrapping a gift basket:
– First, choose a nice basket with all the items you want to include. If you need help deciding what size to get, err on caution and go with a larger one.
– Next, start by adding some tissue paper or shredded paper to the bottom of the basket. This will help you fill it out and provide support for the items you’ll be adding later.
– Once you have your base layer, add your smaller items first. This way, they’ll be easier to arrange around larger items later on.
– As you continue filling up the basket, try to create an aesthetically pleasing arrangement. Be mindful of colours, sizes and shapes as you select each item.
– Once everything is in place, take a step back and see if there’s anything else you’d like to add or adjust. Sometimes it takes a little trial and error before everything looks right.
– To finish things off, cover the basket’s contents with more tissue paper or cellophane wrap.
What Type of Wrap is Used for Gift Baskets?
Many types of wraps can be used for gift baskets, but the most common and popular type is cellophane wrap. Cellophane is a thin, transparent film made from cellulose. It’s typically used for wrapping flowers, gifts, and food because it’s moisture-resistant and doesn’t tear easily. It’s also available in various colours, so you can find the perfect hue to complement your basket contents.
How Do You Wrap a Bundle of Gifts?
Gift wrapping is a great way to show your loved ones how much you care. It can be tricky to know how to wrap a bundle of gifts, but with a few simple tips, you’ll be an expert in no time!
To start, you’ll need some sturdy wrapping paper and tape. Choose a paper that will hold up well to being wrapped around multiple times. You want the paper to rip and tear slowly. Next, measure the circumference of the bundle of gifts. This will help you determine how much paper you’ll need to cover the gifts completely. Once you have your supplies, it’s time to start wrapping! Begin by placing the gifts in the center of the wrapping paper. Then, bring one end of the paper up and over the top of the gifts, tucking it underneath as you go. Repeat with the other side until all of the gifts are covered. Finally, use tape to secure the ends of the wrapping paper in place. Be sure to use enough tape so that everything stays put while transported. And that’s it! Your bundle of gifts is now ready for giving!
How Do You Wrap a Gift Basket With Clear Paper?
If you’re looking to add a touch of elegance to your gift basket, wrapping it in the clear paper is great. Here’s how you can wrap a gift basket with clear paper:
1. Start by measuring the dimensions of your basket and then cut out a piece of clear paper that will be large enough to wrap around it.
2. Next, fold the piece of paper in half and place the basket in the middle.
3. Once the basket is in position, start wrapping it up by folding the sides of the paper over and securing them with tape or glue.
4. Add a bow or other decoration to make your wrapped gift basket look extra special!
Finally
Gift wrapping baskets can be tricky, but with a few tips and tricks, it can be easy and fun! Here are some ideas on how to gift wrap baskets:
-Start by choosing the right size basket for your item. You want the basket to be a manageable size.
-Next, choose the type of paper you want to use. Many options are available, so take your time and pick something that will look nice.
-Once you have your materials, start wrapping the basket’s bottom with paper. Then, work your way up, folding the paper as you go.
-To finish things off, add a bow or other decoration to make it look extra special.