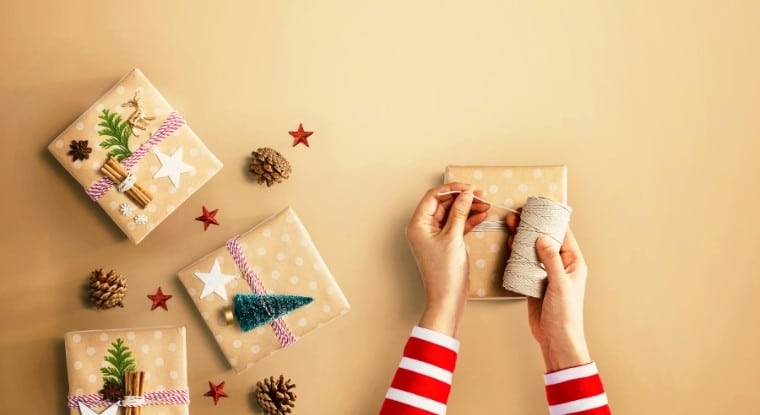
Christmas is right around the corner, and if you’re like most people, you still have a few gifts to wrap. If you’re tired of using store-bought wrapping paper, try making your gift bags out of fabric. Fabric gift bags are easy to make, and they can be reused year after year.
Plus, they add a personal touch to any gift.
- Purchase some small Christmas gift bags
- You can find these at most stores during the holiday season
- Choose the items you would like to put in the bags
- Small toys, candies, and other trinkets work well
- Place the items in the bag, and tie it shut with a piece of ribbon or string
- Repeat steps 2-3 for each bag until you have created as many as you need.
How to Make a Gift Bag Step by Step
Step 1: Cut a rectangular piece of construction paper. The size doesn’t have to be exact, but it should be large enough to wrap around the item you’re giving.
Step 2: Fold the paper in half lengthwise. Then, fold it in half again, so it’s now a quarter of its original size.
Step 3: Unfold the paper and fold each side towards the center crease. This will create four triangular folds.
Step 4: Fold the paper in half once more, ensuring that the triangle folds are tucked inside. This will give you a clean edge on both sides of the bag. Step 5: Use tape or glue to secure the sides of the bag closed. You can also add handles by punching holes on either side of the bag and threading ribbon or string through them.
How Can I Make a Homemade Christmas Bag?
If you want to add a personal touch to your Christmas gifts this year, why not try making your own Christmas bags? It’s a relatively straightforward process; with some simple materials, you can create something unique and stylish. Here’s what you’ll need:
- Fabric of your choice (enough to make two rectangles measuring 12″ x 16″)
- Coordinating thread
- Scissors
- Pins – Sewing machine (or needle and thread if hand sewing)
First, cut your fabric into two rectangles measuring 12″ x 16″.
Then, use a coordinating thread and sew the long sides of the rectangles together, leaving the top open. Next, turn the bag right side out and press the seams flat.
Finally, sew a full hem along the opening of the bag.
And that’s it! Your homemade Christmas bag is now complete.
What Should I Put in My Christmas Goodie Bag?
1. Candies and sweets are always favorites, so fill your goodie bag with everyone’s favorite holiday treats. If you’re looking for ideas on what to put in your Christmas goodie bag, you’ve come to the right place! Here are some great ideas that will make your goodie bag the hit of the party:
2. Small toys or trinkets are also a great addition to any goodie bag. Choose items that appeal to all ages, such as keychains, puzzles, ornaments, etc.
3. Personalized items are always a big hit! Add in some custom-made Christmas cookies or candies with each person’s name on them. Or, include a mug or T-shirt with everyone’s name printed on it.
4. For something different, try adding festive home décor items like scented candles, holiday dish towels, ornaments, and so on.
5. Finally, don’t forget the wrapping paper! Make sure to include enough tissue paper and bows so that each person can wrap up their goodies when they’re ready to take them home.
How Do You Make Reusable Christmas Bags?
If you’re looking for a way to reduce your holiday waste, why not make your own reusable Christmas bags? It’s easy to do, and you can customize them to match your holiday decor. Here’s how:
1. Gather your materials. You’ll need some fabric (felt works well), scissors, and a hot glue gun.
2. Cut out two identical pieces of fabric in the shape of a Christmas tree. Make sure they’re big enough to fit all of your goodies!
3. Use hot glue to attach the two pieces of fabric, leaving an opening at the top for stuffing.
4. Fill your bag with wrapping paper, bows, and other holiday decorations. Tie a ribbon or string around the top to close it up.
5. Hang your reusable Christmas bag on the mantel or use it as a gift tag!
How Do You Make a Gift Bag Step by Step?
When it comes to giving gifts, presentation is key. A beautiful gift bag can make all the difference in how your present is received. Fortunately, making a gift bag is easy and only requires a few supplies.
With time and effort, you can create a stunning gift bag that will impress anyone. Here’s what you’ll need to get started:
- Wrapping paper
- Tissue paper
- Scissors
- Ruler or measuring tape
- Stapler
- Double-sided tape or glue stick.
First, cut your wrapping paper to the desired size. Once you have your piece of wrapping paper, fold it half lengthwise so that the short sides meet in the middle. Cut along the fold so that you now have two pieces of wrapping paper that are identical in size. For reference, most retail store gift bags are around 20″ x15″ x6″.
Next, please take one of the pieces of wrapping paper and fold it in half again, this time widthwise, so that the long sides meet in the middle. Once more, cut along the fold to create two smaller pieces of wrapping paper. You should now have four equal-sized pieces of wrapping paper in total.
Now it’s time to assemble your bag! Take two pieces of wrapping paper and line them up with the wrong sides facing out (so that the pretty designs are on the inside). Use double-sided tape or a glue stick to attach these two pieces along one long side and one short side. Repeat this step with the remaining two small pieces of wrapping paper so that you have two “bag halves” total. To finish assembling your bag, take one “bag half” and insert it inside the other “bag half” so that the wrong sides are facing each other (again, you want the pretty designs showing on both the outside and inside of your finished product). And voila! Use double-sided tape or glue to attach these final three open sides.
Your gift bag is complete! Now all that’s left to do is add some tissue paper for padding and fill it up with whatever goodies you like!
How To Make A Christmas Gift Bag Out Of Wrapping Paper
Conclusion
Looking for a way to make your Christmas gifts stand out this year? Why not try making your gift bags? With just a few supplies and a little creativity, you can create unique and festive gift bags that are sure to impress.
Here’s how: To start, you’ll need essential supplies, including paper or fabric, scissors, glue or tape, and ribbon or string. You can find all of these items at your local craft store.
Once you have your supplies gathered, decide on the size and shape of your bag. Cut out two pieces of paper or fabric in the desired shape and then use glue or tape to attach them.
Next, decorate your bag! This is where you can get creative and have fun with it. Use markers, stamps, glitter, sequins, etc., to add holiday cheer to your bag. Once satisfied with the design, add any final touches like handles or a closure.
Now it’s time to fill your bag with goodies! Choose items that fit well with the theme of your bag – homemade cookies for a baking-themed bag or festive socks for a cozy winter-themed one. Using paper, you may want to reinforce the sides with some cardboard for extra stability.
Whatever you choose, ensure everything fits snugly inside, so nothing gets damaged during transport. And there you have it – beautiful DIY Christmas gift bags sure to impress!